Motivation
Use the cellphone “Sony Ericsson T630” to make and receive calls using Arduino. Especially of interest for me is the caller number identification.
Some advantages of using an old AT-command capable phone:
- No Internet connection is needed, only GSM connectivity
- No main power needed, can run on battery
- Low cost, because the phone is old and receiving calls are free
Wiring
Connect the Arduino with the phone:
The pinout of the phone can be found at: http://pinouts.ru/CellularPhones-P-W/erics_t28_pinout.shtml
Three pins are of interest: data in (4:RX), data out (5:TX) and ground (10:DGND)
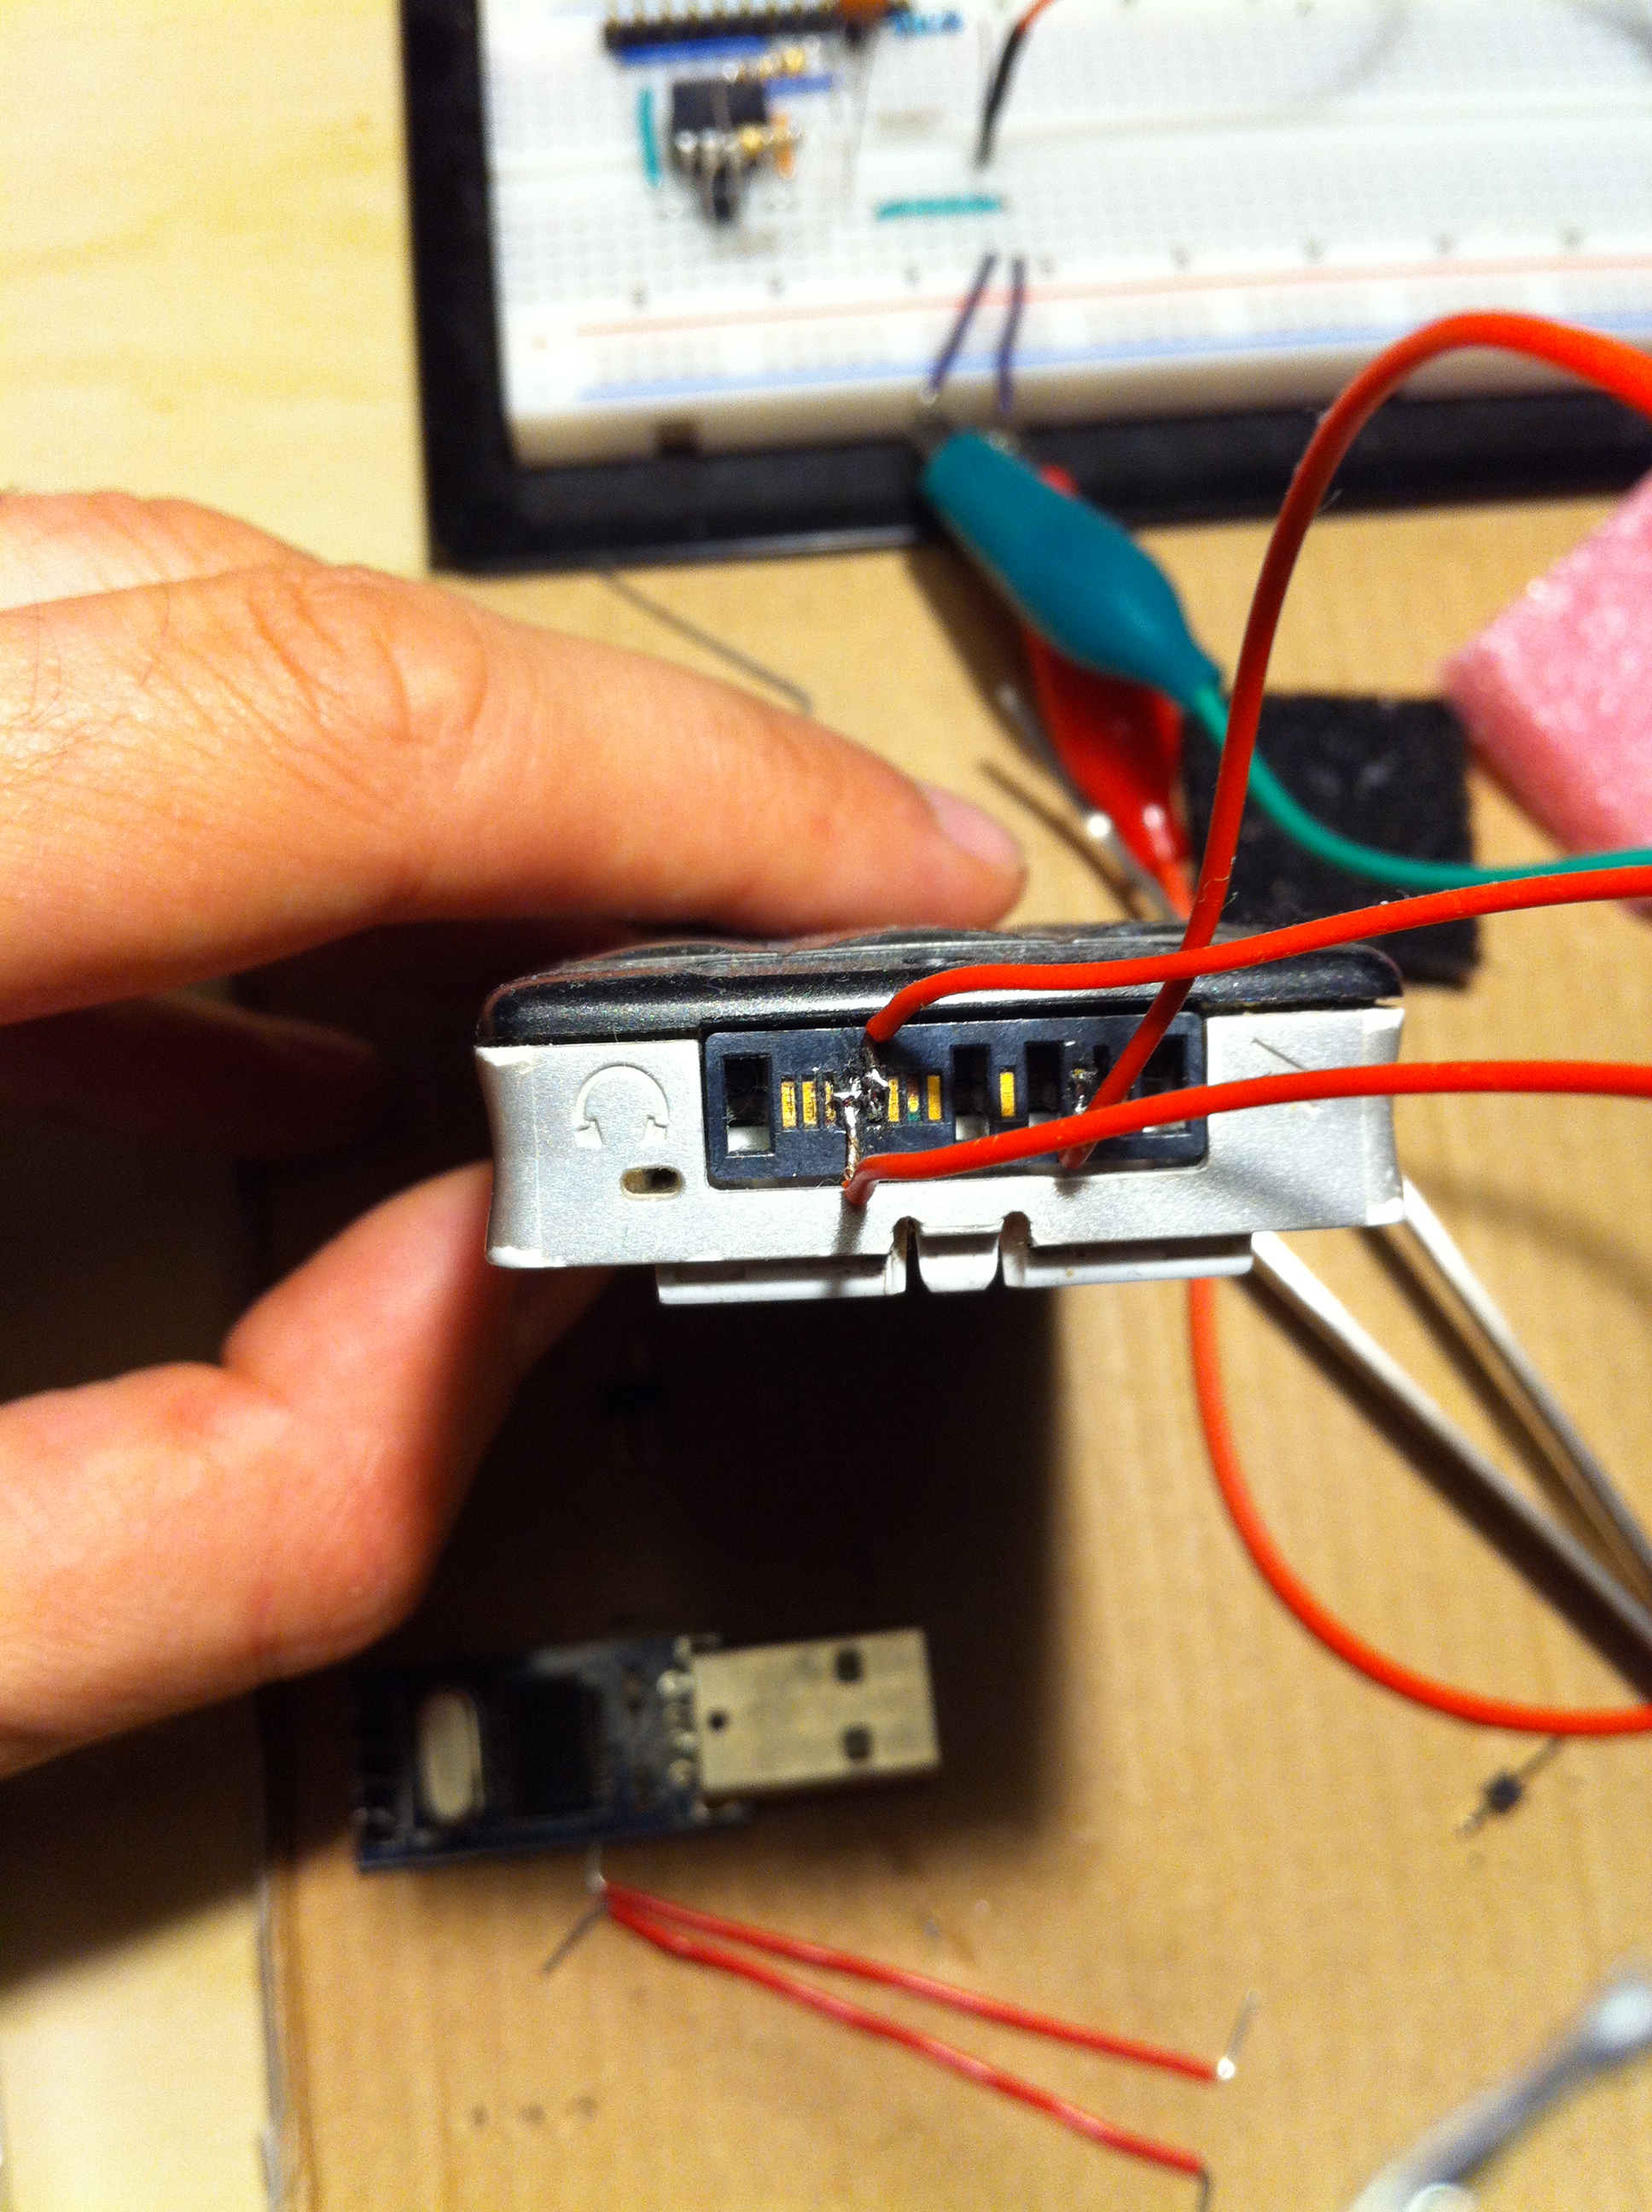
Wires are directly soldered to the pins
Connect the wires (Arduino <–> Phone):
Arduino GND <–> phone pin 10 (DGND)
Arduino pin 10 (RX) <–> phone pin 5 (TX)
Arduino pin 11 (TX) <–> R <–> phone pin 4 (RX) <–> R <–> Arduino GND
Notes:
- R stands for resistor and the value should be 330 ohms. They are used to divide the voltage.
- Verify the voltage between phone GND and phone TX. It should be about +2,6V
- Software-Serial is used to connect the Arduino to the phone. The Hardware-Serial (pin 0 and pin 1) is used for debugging output.
Software
#include <SoftwareSerial.h>

#define rxPin 10
#define txPin 11

SoftwareSerial mySerial(rxPin,txPin); // RX, TX

void setup(){

  pinMode(rxPin, INPUT);
  pinMode(txPin, OUTPUT);

  Serial.begin(9600);
  Serial.println("Arduino serial initialized!");
  delay(10);

  mySerial.begin(9600);
  Serial.println("Software serial initialized!");
  delay(10);
}

void loop(){
  issueCommand("AT");
  readSerial();
  delay(500);

  issueCommand("AT+CRC=1");
  readSerial();
  delay(500);

  issueCommand("AT+CLIP=1");
  delay(500);

  //call number 123456
  //issueCommand("ATD123456;");

  while(true){
    readSerial();
  }
}

void issueCommand(char* msg){
  mySerial.println(msg);
  Serial.print(msg);
  delay(10);
}

void readSerial(){
  while (mySerial.available()){
    Serial.write(mySerial.read());
    delay(10);
  }
}
Expected output:
Arduino serial initialized!
Software serial initialized!
ATAT+CRC=1+CRC=1
OK
AT+CLIP=1+CLIP=1
OK
+CRING: VOICE
+CLIP: "+43XXXXXXXXXXX",145,,,"Michael Rogger"
+CRING: VOICE
+CLIP: "+43XXXXXXXXXXX",145,,,"Michael Rogger"
The magic AT-command AT+CLIP is activated before the phone is called, otherwise the number will not be identified!
Possible use cases
- A garage door opener. A caller is identified by its number (white list), if found in database the garage door will open.
- Power on/off a AC system. If a caller is identified by its number (white list), a relay could switch on/off any device.
- Power out notifier. If the electricity on the main line is out (AT command to check if the phone is discharging) the phone can call a number or send an SMS. Might be useful to notify a person that all the stuff in the fridge is at risk.
Sources
Arduino and T210: http://forum.arduino.cc/index.php/topic,22411.0.html
Pinout: http://pinouts.ru/CellularPhones-P-W/erics_t28_pinout.shtml
AT commands for Sony Ericsson cellphone: http://www.daimi.au.dk/~jones/sms/packed/dg_at_r3a.pdf

Click to access DW-65054-dg_at_2006–10_r17a.pdf
Thank you !
very nice tutorial, it helped me to connect my T230 to arduino.
But T230 works in text mode 🙂
Here’s sample program (working) for sending, reading sms and making a call.
Not sure how to check if phone is charged or if it has connection with gsm provider..
http://www.vsx.pl/arduino-i-sony-ericsson-t230-wys…